Minecraft Chromebook Installation Guide
Author: Hunter
Mar 14,2025

Minecraft's immense popularity spans nearly every device, and Chromebooks are no exception. Running on Chrome OS, these convenient devices present a unique challenge for Minecraft installation. But don't worry, it's entirely possible to play Minecraft on your Chromebook! This guide walks you through the process, offering tips for optimal performance.
For smooth gameplay, your Chromebook needs to meet these minimum requirements:
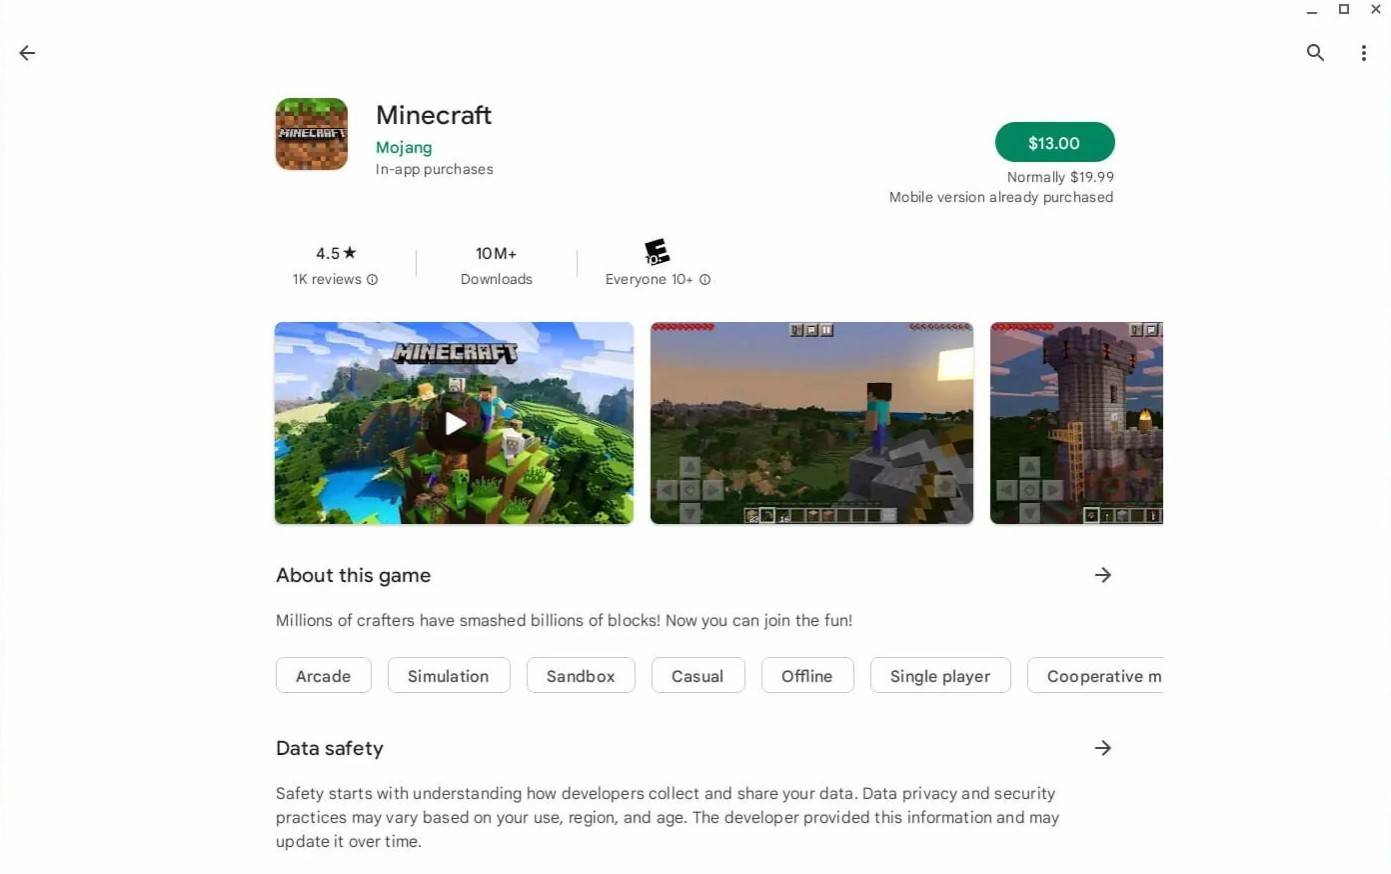
These are minimum specs. If you experience stuttering, see our performance optimization tips below. The easiest way to get Minecraft is via the Google Play Store. Simply search for "Minecraft," purchase the Bedrock Edition ($20, or $13 if you already own the Android version), and you're ready to play! This method bypasses the more technical installation steps detailed below.
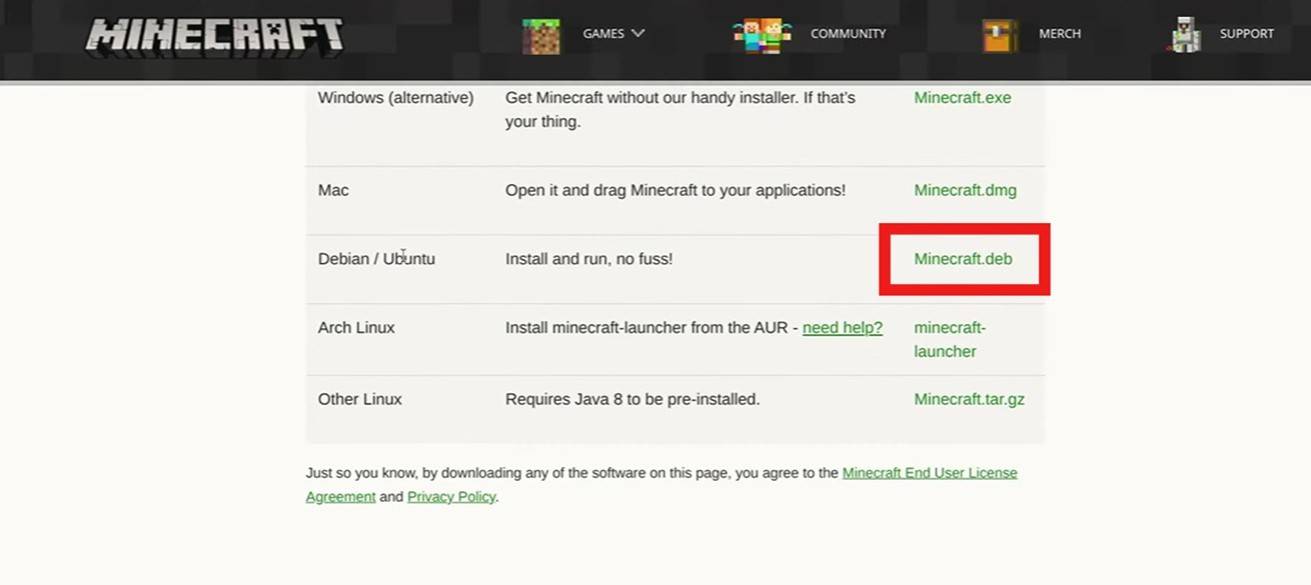
However, if you prefer a different Minecraft experience, Chrome OS's Linux-based foundation allows for alternative installation methods. This process requires more technical steps, detailed below.
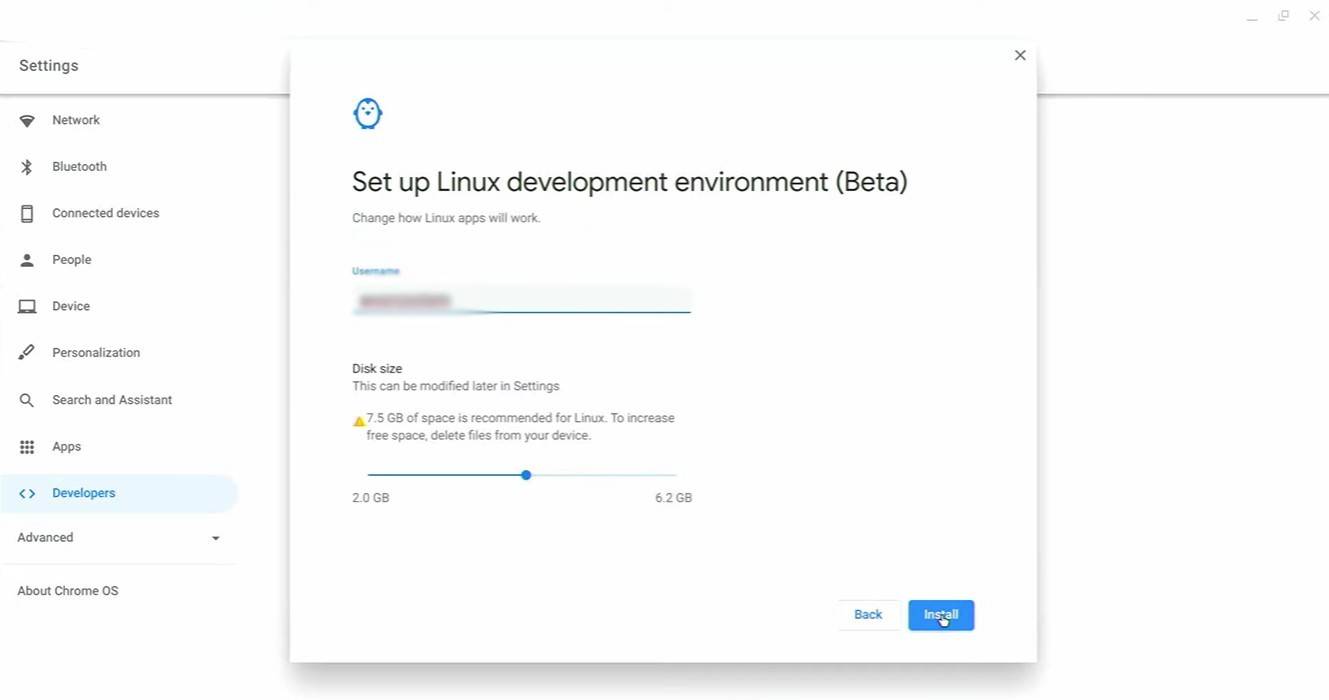
Before installing, you must enable Developer Mode. This allows for more advanced system modifications. Access your Chromebook's settings (usually via the Start menu equivalent), navigate to the "Developers" section, and enable the "Linux development environment." Follow the on-screen instructions. Once complete, a Terminal window (similar to Windows' command prompt) will open, ready for the next steps.


![NULL [Remastered]](https://imgs.39man.com/uploads/71/1719651062667fcaf6c483b.png)